


Google Colab is a free platform that allows users to run Python notebooks on cloud servers. It provides access to a high-performance computing environment without requiring any setup or installation on your local machine. One popular application for Google Colab is Stable Diffusion, which can be used to make AI-generated images in a few seconds from text prompts.
In this article, I will be showing you how to set up Stable Diffusion with Automatic1111 on Google Colab for free. There are a few different web interfaces available to run stable diffusion, automatic1111 is the most popular and feature-packed.
Step 1: Login or Create a google account
If you don’t already have a Google account go to this link and create an account by filling out the registration page with your name, email address, and password. Click “next” and follow the instruction to finish the registration process. Once you have created your Google account or if you already have one, simply go to this link and log in.
Step 2: Open GitHub notebook
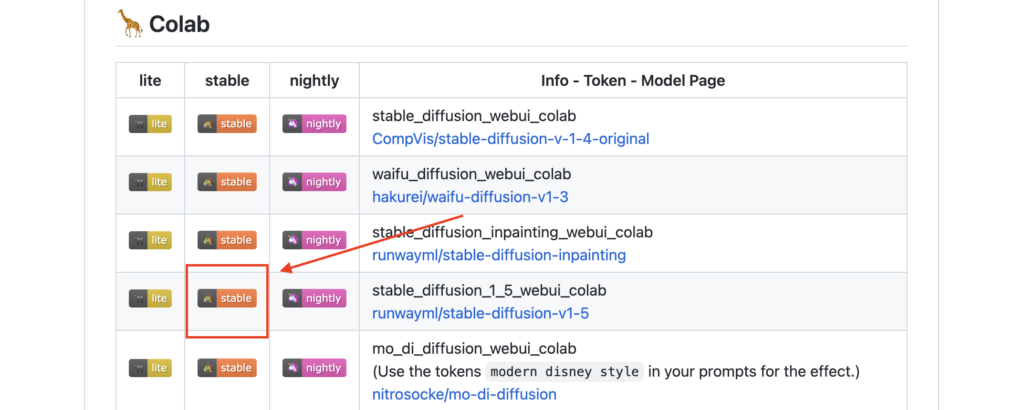
Since this is a beginner’s tutorial we will not be going into the details of how GitHub and other services work in detail. To install automatic1111 with stable diffusion on your google Colab, click on this link, it will take you to a GitHub page, scroll down to the Colab section and click the “stable” button given on the left side of stable diffusion 1_5_webui_colab. Check the screenshot below to make click on the correct link. This will open the relevant colab notebook.
Step 3: Install Stable Diffusion with Automatic1111 on Google Colab
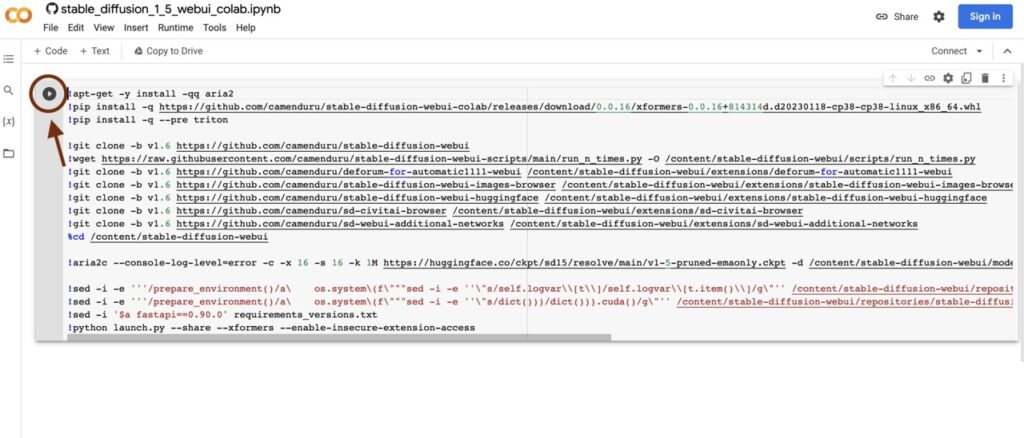
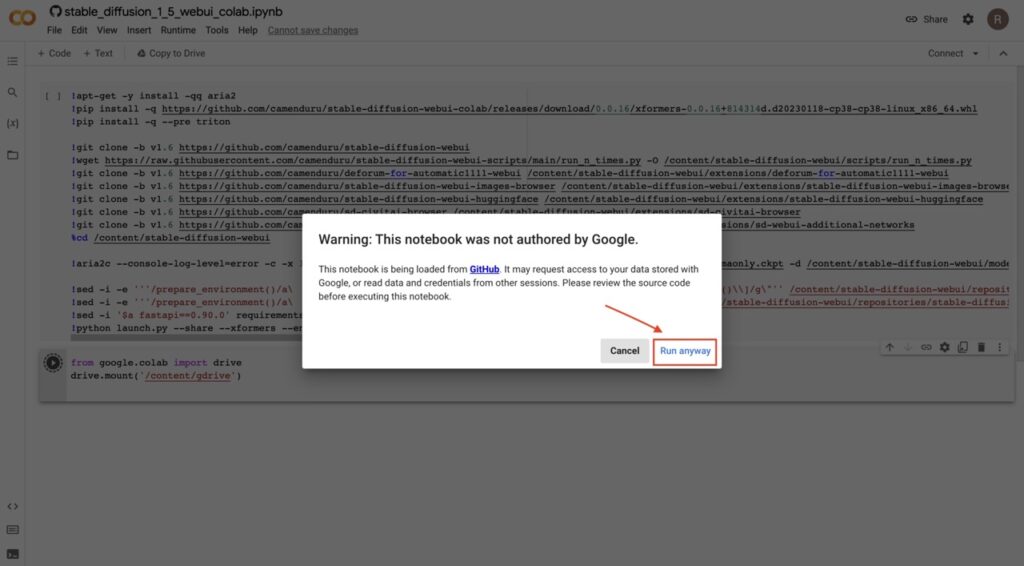
To install stable diffusion on your Google Colab, you will just need to click on the Run button on the left side of the code cell, see the screenshot given below. Once you click on the run button, Colab will show you a warning letting you know that, it is a code not authorized by Google, You can safely ignore this warning and click on Run anyway. This warning shows up every time you try to run any third-party notebooks on Google Colab. Once you click on “Run” the python code will start executing, you will see it installing all the required programs, wait a few minutes for it completes this process.
Step 4: Open the Stable Diffusion web interface
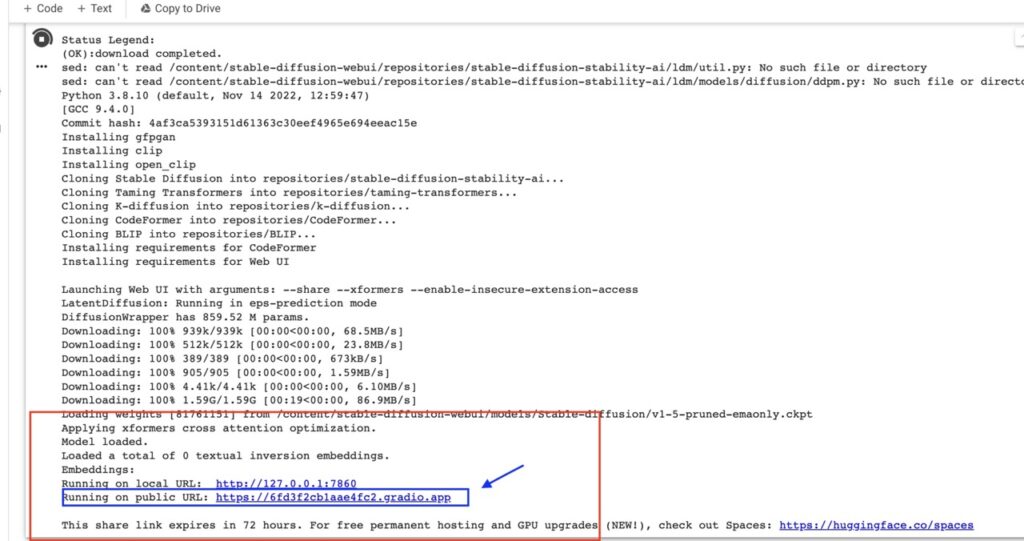
once the installation is complete, you will see two links. One link will be a local lost link that starts with 127, you can ignore that and click the 2nd gradio or trycloudflare link, see the screenshot below for reference.
Step 5: Load the Stable Diffusion 1.5 & start generating images
once you click on the link, you will see the automatic1111 web interface. Here is where you will be generating images from prompts. Follow the next steps and refer to the below-given annotated screenshot for reference.
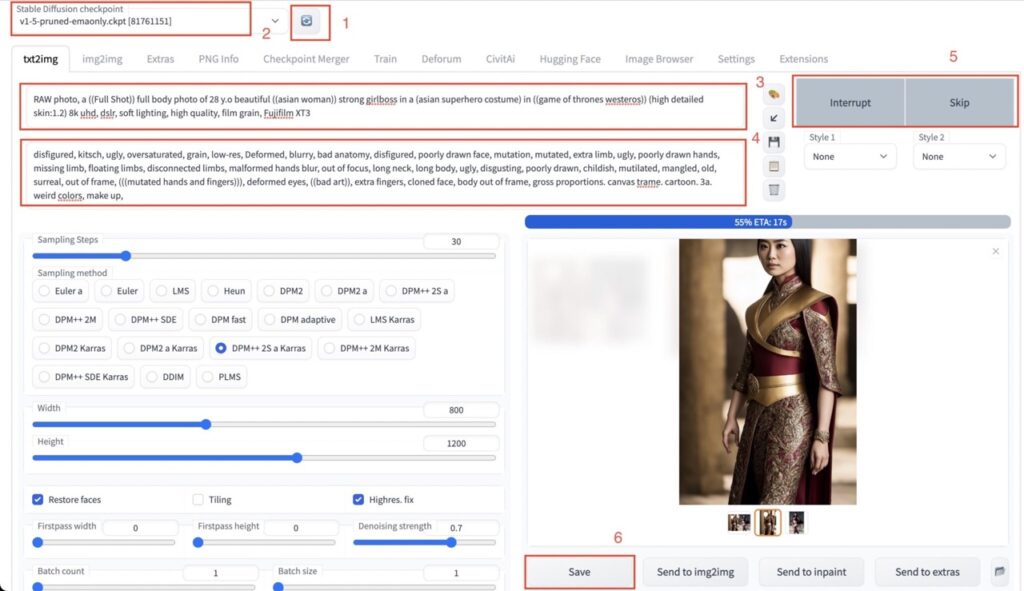
Refresh the checkpoint list
First, you will need to load the model, to do that, click on the refresh button given on the top left side.
Select Stable Diffusion checkpoint
Next, you will need to select v1-5-pruned-emaonly.ckpt from the dropdown.
Add a positive prompt
Now let’s add a prompt to generate the image you want to see. Here is an example of a positive prompt:
RAW photo, a ((Full Shot)) full body photo of 28 y.o beautiful ((Asian woman)) strong girlboss in an (Asian superhero costume) in ((game of thrones westeros)) (high detailed skin:1.2) 8k uhd, DSLR, soft lighting, high quality, film grain, Fujifilm XT3Add a negative prompt
Next, we will add a negative prompt. Negative prompts are important to get good outputs from Stable Diffusion. You are essentially telling the stable diffusion model what you don’t want to see here. Here is an example of a negative prompt:
disfigured, kitsch, ugly, oversaturated, grain, low-res, Deformed, blurry, bad anatomy, disfigured, poorly drawn face, mutation, mutated, extra limb, ugly, poorly drawn hands, missing limb, floating limbs, disconnected limbs, malformed hands blur, out of focus, long neck, long body, ugly, disgusting, poorly drawn, childish, mutilated, mangled, old, surreal, out of frame, ((mutated hands and fingers)), deformed eyes, ((bad art)), extra fingers, cloned face, body out of frame, gross proportions. canvas trame. cartoon. 3a. weird colors,make upClick on generate button
Once you entered both positive and negative prompts, click on the generate button on the top right side.
Save the image
You will not see progress on top of the preview section and within a few seconds, the image will be shown in the preview tab. If you are happy with the generated image click on the save button to download the image.
Conclusion
In this article, I have shown you how to set up and run Stable diffusion within a few minutes on Google Colab. By following these steps, you can take full use of the powerful computing resources provided by Google Colab to create and share stable diffusion-generated images for free. In the upcoming article, I will be showing ways to create high-quality images with custom models.