


Are you looking to automatically save images you generated on stable diffusion Google Colab to Google Drive? This is a common challenge faced by most new users of stable, especially if you followed the last article on how to use stable diffusion on Google Colab. The good news is that it is possible to automate this process, which can save you a lot of time and effort.
In this article, I will be showing you a step-by-step guide on how to save stable diffusion images from Google Colab to Google Drive automatically very easily and also answer some of the frequently asked questions to help you understand this process better.
Step 1: Mount Google Drive To Google Colab Notebook
The first step you have to do is to mount your Google Drive to your Colab notebook. This will allow you to save your Google Colab files directly to Google drive. To do this, Click on the “+ code” button given on the top left side and then paste the following code to the cell and click on the play button on the left side on the new cell to execute the code.
from google.colab import drive
drive.mount('/content/gdrive')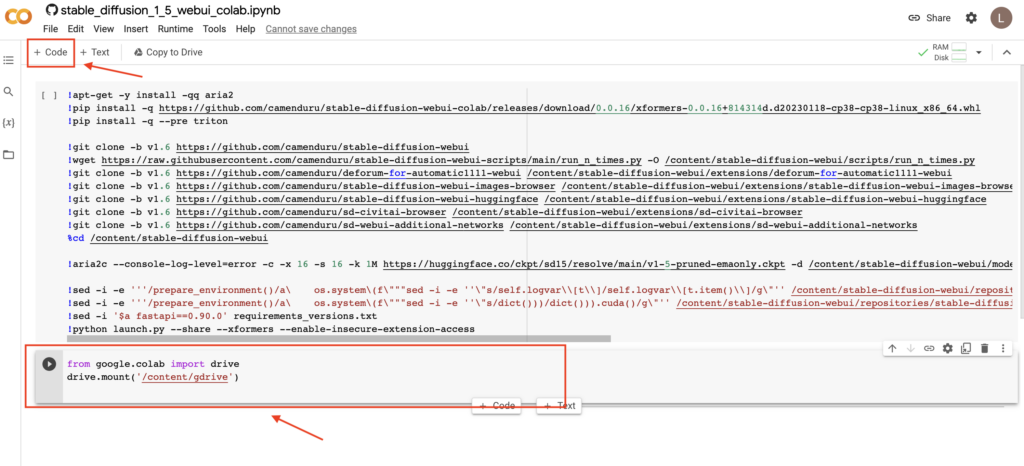
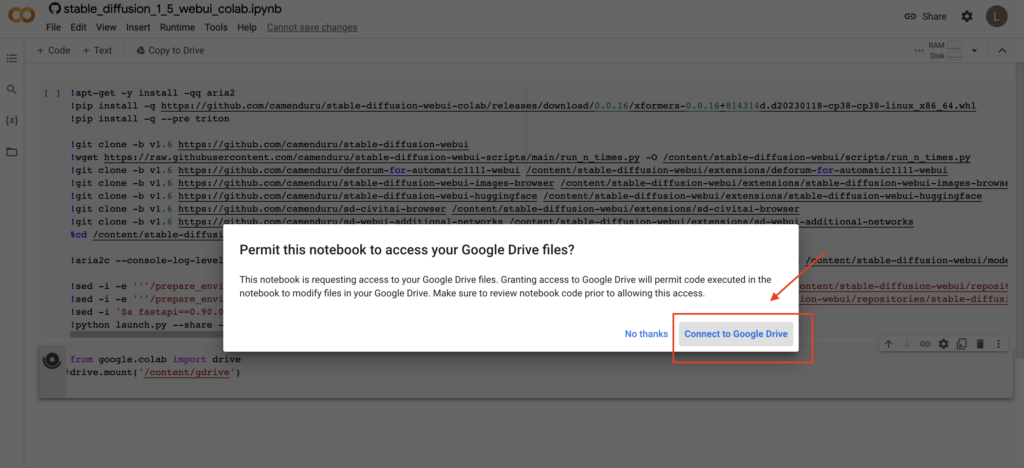
Step 2: Grand Access To Google Drive
The next step is to grant access to google drive before you do that a warning will pop up letting you know that this is a third-party notebook, you can safely ignore that and click on “Run anyway”. About seconds later you will see another popup asking if you would like to grant access to google drive, click on the “connect to google drive” button.
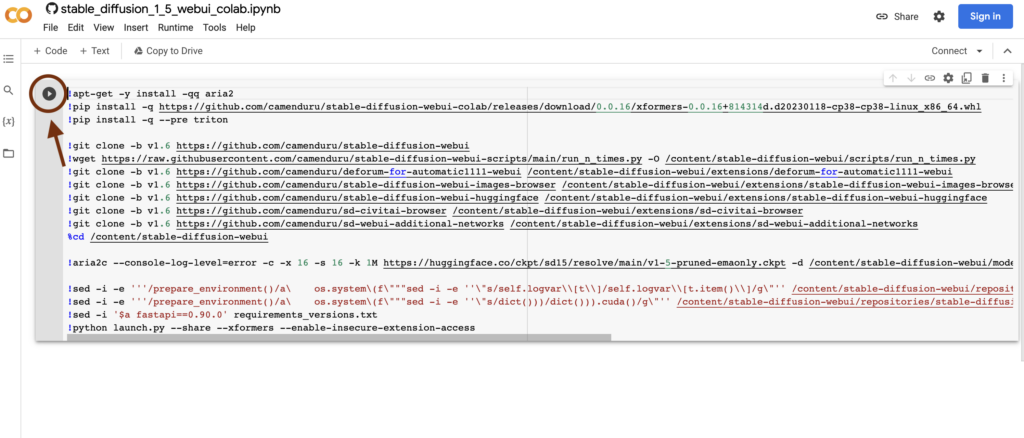
Step 3: Run The Primary Stable Diffusion Installation Code
Now that you have successfully connected your Colab Notebook to stable diffusion, the next step is to run the stable diffusion installation code. If you don’t know how to do that, read this article. To run the code, click on click on the play button on the left side of the new cell to execute the code.
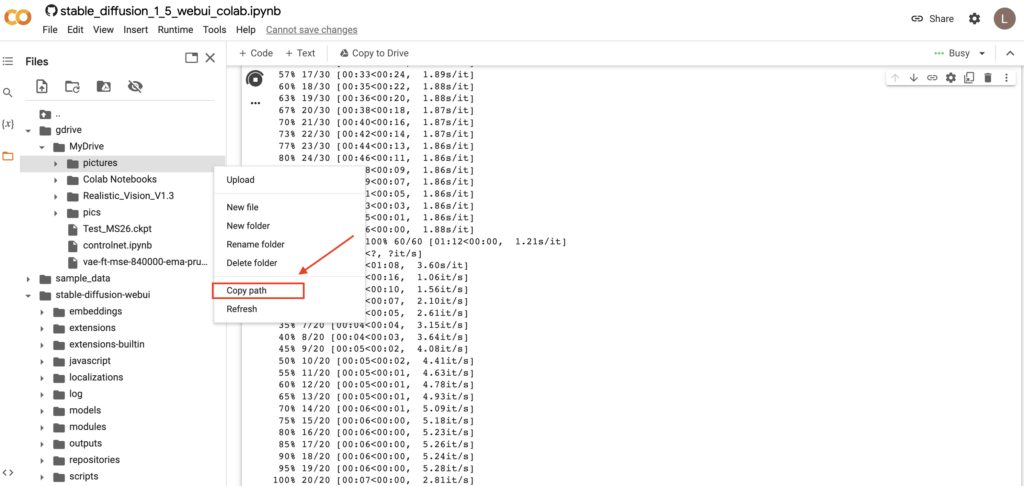
Step 3: Copy Google Drive Location Path
The next step is to copy the location of the google drive from the google colab file manager. click on the folder icon given on the left side of your notebook. Next, click on “drive” and then click on “my drive” From, here right click a folder you wish to save the images and click the “copy path” option.
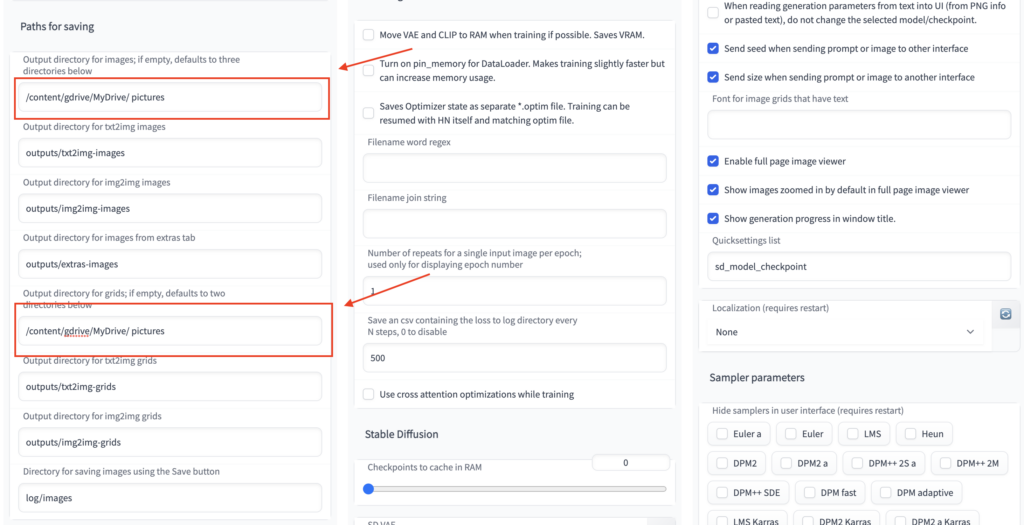
Step 4: Update the Image Directory
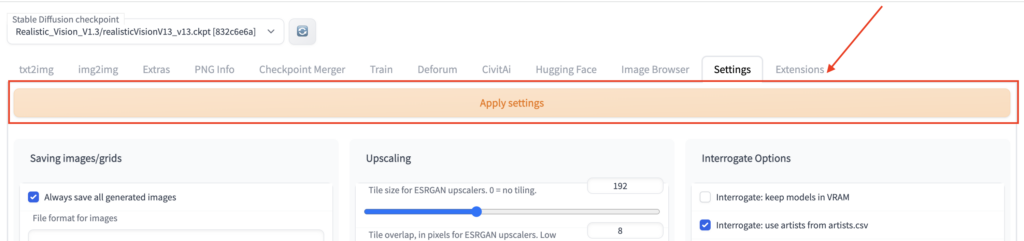
once you have copied the path of the folder where you want to save the image, next you will need to go to your automatic1111 setting tab given at the top of the page. Here you will have to have to paste the google drive path in both the output directory for images and the output directory for grids as shown in the screenshot given below. Next, you will have to click on the “Apply Setting” to save the changes.
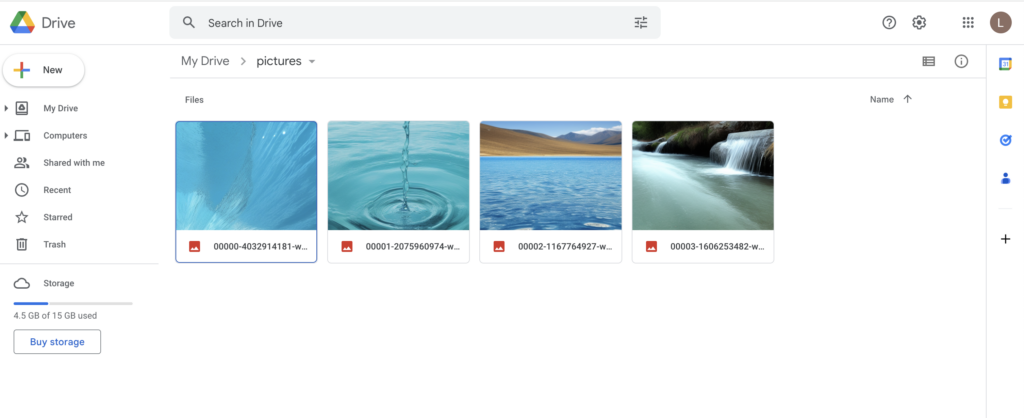
Step 5: Check Google Drive To Confirm
To confirm if the changes you made are working, generate some image new images on automatic1111 interface and go to your google drive folder where you saved the file. see if the pictures appear in the folder. If you see the generated images here, then you have successfully configured automatic1111 to save images to google drive automatically.
Conclusion
In conclusion, automating the process of saving Stable Diffusion images from Google Colab to Google Drive can save a lot of time and effort for users. By following this easy-to-follow guide, you can easily link your Colab Notebook to Google Drive, grant access to it, and update the image directory to automatically save images. Overall, this process can simplify the task of saving images and help users focus on their creating amazing art with stable diffusion.